



Hair Waver: Complete Guide to Beach Waves, Types, Techniques & Hair Care
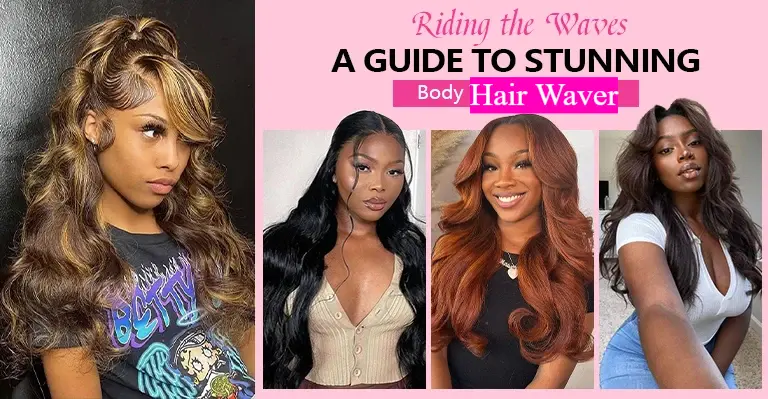
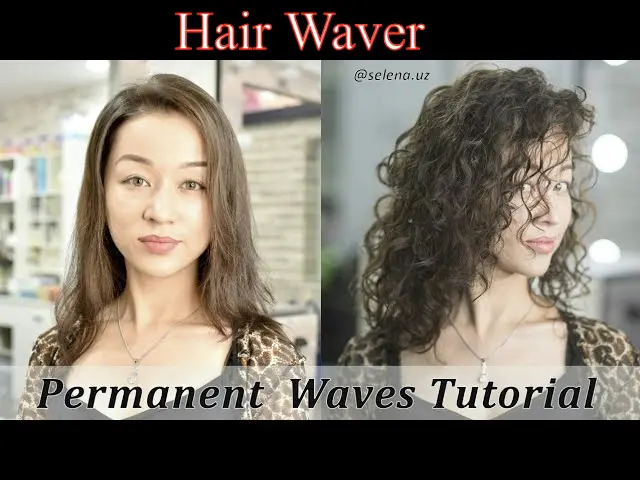
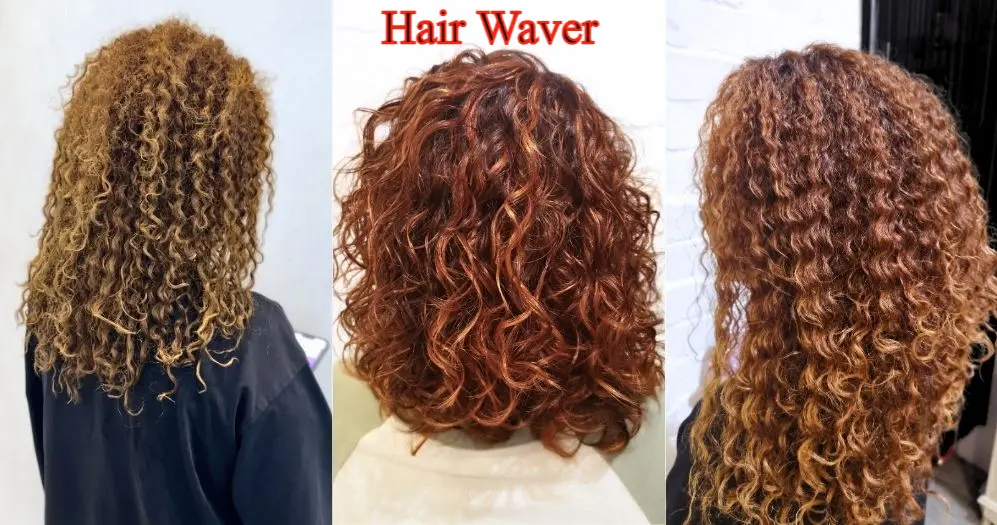
A hair waver is a heated styling tool designed to create textured, S-shaped waves without wrapping your hair around a traditional curling iron. Depending on the barrel size and design, a waver can create everything from soft beach waves to deeper, more defined mermaid waves.
Hair wavers are available in several styles, including triple-barrel, deep-wave, mini and single-barrel designs. Choosing the right tool depends on your hair length, thickness, texture and the type of waves you want.
This guide explains how hair wavers work, which type is best for different hair types, how to use one correctly, how to protect your hair from heat and how to make your waves last longer.
What Is a Hair Waver?
A hair waver is a heated styling tool that creates waves by pressing sections of hair between specially shaped heated barrels or plates.
Unlike a curling iron, which wraps hair around a barrel to create curls, a hair waver creates a repeated wave pattern by clamping the hair.
Most wavers have multiple barrels, although some models use a single deep-groove barrel.
The final result depends on:
- Barrel size
- Wave depth
- Hair length
- Hair thickness
- Temperature
- Section size
- How long you hold the tool
How Does a Hair Waver Work?
A hair waver uses heat to temporarily reshape the hair.
When hair is exposed to heat, its temporary hydrogen bonds are altered. As the hair cools, it takes on the shape created by the styling tool.
This is also why allowing your waves to cool before brushing or manipulating them can help the style last longer.
A waver works by:
- Heating the barrels or plates.
- Placing a section of dry hair between them.
- Holding the tool for several seconds.
- Releasing the section.
- Moving down the hair.
- Allowing the finished waves to cool.
The exact temperature and timing should always follow your specific tool’s instructions and your hair’s condition. tymobeauty.com
Types of Hair Wavers
1. Triple-Barrel Hair Waver
Triple-barrel wavers are among the most recognizable types.
They normally have three heated barrels that create repeated S-shaped waves.
Best for:
- Beach waves
- Mermaid waves
- Medium to long hair
- Fast styling
- Consistent waves
They are particularly beginner-friendly because you don’t need to manually wrap the hair around a barrel.
2. Deep Hair Waver
Deep wavers create larger and more pronounced waves.
They are a good option if you want a more dramatic texture rather than subtle everyday waves.
Best for:
- Thick hair
- Long hair
- Defined waves
- Special occasions
- Voluminous hairstyles
3. Mini Hair Waver
Mini wavers have smaller barrels or plates and are easier to maneuver around shorter sections.
Best for:
- Short hair
- Bangs and face-framing sections
- Travel
- Smaller sections
- More detailed styling
4. Single-Barrel Waver
Single-barrel designs generally provide more control over where the wave begins and how it develops.
They can be useful for creating softer, less uniform waves.
Hair Waver vs Curling Iron
| Feature | Hair Waver | Curling Iron |
|---|---|---|
| Main Result | Waves | Curls |
| Technique | Clamp | Wrap |
| Wave Pattern | S-shaped | Spiral/curved |
| Beginner Friendly | Usually | Requires practice |
| Styling Speed | Fast | Moderate |
| Texture | Beachy/textured | Defined/bouncy |
| Best For | Wavy hairstyles | Curls and loose curls |
If you want uniform beach waves, a hair waver is usually easier.
If you want individual curls, a curling iron is generally more suitable.
How to Choose a Hair Waver
Before buying a waver, consider these features.
Temperature Control
Adjustable temperature is one of the most useful features.
Different hair types respond differently to heat, so having control over the temperature is preferable to using a tool with only one fixed setting.
Start with the lowest effective temperature rather than automatically selecting maximum heat.
Barrel Size
Barrel size affects the final wave.
Smaller barrels
Create tighter and more defined waves.
Larger barrels
Create looser and softer waves.
Choose the barrel size based on the hairstyle you want rather than simply choosing the largest or smallest option.
Barrel Material
Hair wavers may use materials or coatings such as:
- Ceramic
- Tourmaline
- Titanium
Ceramic is commonly chosen for even heat distribution.
Titanium heats quickly and can work well for thicker hair, but high heat can be too aggressive for fine or damaged hair.
The coating alone does not make a tool completely safe; temperature, exposure time and hair condition still matter.
What Temperature Should You Use?
There is no single temperature that is perfect for everyone.
A safer approach is to start low and increase gradually if necessary, while following the manufacturer’s instructions. popsugar.com
A general starting framework is:
| Hair Type | Starting Range |
|---|---|
| Fine or fragile hair | 250–300°F |
| Normal/medium hair | 300–350°F |
| Thick/coarse hair | 350–400°F |
| Very resistant hair | Follow manufacturer’s maximum |
For color-treated, bleached or damaged hair, use extra caution and the lowest effective temperature.
Do not assume a higher temperature gives better waves. More heat can increase the risk of dryness and damage.
How to Use a Hair Waver
Step 1: Start With Completely Dry Hair
Never use a standard hair waver on wet or damp hair unless the manufacturer specifically states that the tool is designed for wet hair.
Dry your hair completely before applying the waver.
Step 2: Apply Heat Protectant
Apply a suitable heat-protectant product according to its instructions.
Allow the product to dry before using the hot tool if required by the product directions.
Step 3: Brush Your Hair
Remove tangles before styling.
Smooth sections are easier to work with and help produce more consistent waves.
Step 4: Divide Your Hair Into Sections
Separate your hair into manageable sections using clips.
Start with the lower layers and gradually work toward the top.
Step 5: Select the Temperature
Choose a temperature appropriate for your hair type and the instructions provided with your waver.
Start lower if you’re unsure.
Step 6: Take a Small Section
Take a manageable section of hair.
For many wavers, around 1–2 inches is a practical starting point, but the ideal section depends on the tool.
Step 7: Clamp the Waver
Place the section between the heated barrels.
Avoid pressing the hot tool directly against your scalp.
Hold for the time recommended by the manufacturer and adjust based on your hair’s response.
Step 8: Move Down the Hair
Release the tool and move it lower on the same section.
Try to align the next wave with the previous one to avoid obvious gaps.
Step 9: Let the Hair Cool
This step is important.
Avoid immediately brushing or aggressively touching freshly waved hair.
Allowing the hair to cool helps the shape set.
Step 10: Finish the Style
Once the entire head is finished, gently separate the waves with your fingers if desired.
A lightweight styling product can help with texture and hold.
How to Get Beach Waves With a Hair Waver
For softer beach waves:
- Start with completely dry hair.
- Apply heat protectant.
- Divide hair into sections.
- Use a moderate temperature appropriate for your hair.
- Start below the roots for a more relaxed look.
- Use slightly larger sections for softer texture.
- Alternate the exact starting position.
- Let the waves cool.
- Separate them gently with your fingers.
- Finish with a lightweight texturizing product if needed.
Avoid making every section perfectly identical if you want a more natural appearance.
Best Hair Waver for Fine Hair
Fine hair generally benefits from:
- Adjustable low temperatures
- Smaller or moderate wave depth
- Lightweight styling products
- Shorter heat exposure
- Heat protectant
Fine hair does not necessarily need maximum heat to create visible waves.
Start at a lower temperature and increase only if necessary.
Best Hair Waver for Thick Hair
Thick or coarse hair may need more time or heat to hold a wave, but maximum heat should not automatically be used.
Look for:
- Adjustable temperature
- Consistent heat
- Larger or deep barrels
- Comfortable grip
- Longer plates if you need to style large sections
Work with manageable sections rather than trying to wave too much hair at once.
Hair Waver for Short Hair
A mini or compact waver can be easier to control on shorter hair.
Take smaller sections and avoid placing the hot tool too close to the scalp.
For a more natural look, concentrate the wave through the mid-lengths rather than forcing a wave directly from the roots.
Hair Waver for Long Hair
Long hair provides more room for creating different wave patterns.
A larger or deep-barrel waver can speed up styling, while a smaller waver can create more defined texture.
For long hair:
- Work in layers.
- Use manageable sections.
- Keep the tool moving down the hair.
- Let each section cool before brushing.
How to Make Hair Waves Last Longer
If your waves disappear quickly, try these techniques:
Use the Right Temperature
Too little heat may not set the wave effectively.
Don’t Overload the Section
Too much hair between the barrels can produce uneven results.
Let Waves Cool
Don’t immediately brush or comb them.
Use Lightweight Hold
A texturizing spray or light-hold hairspray can add grip without making the hair feel heavy.
Avoid Excessive Oil
Heavy oils can weigh down waves, particularly on fine hair.
Common Hair Waver Mistakes
Using a Waver on Wet Hair
Unless your specific tool is designed for wet hair, don’t use it on damp hair.
Using Maximum Heat
More heat does not automatically mean better results.
Taking Huge Sections
Large sections can produce uneven waves.
Holding the Tool Too Long
Excessive heat exposure increases the risk of damage.
Brushing Immediately
Freshly styled hair can lose its wave pattern when brushed while still warm.
Skipping Heat Protection
Heat protectant should be part of your styling routine.
Using a Dirty Waver
Product buildup can affect performance and transfer residue onto the hair.
How to Protect Hair From Heat Damage
Heat styling can contribute to dryness and damage, particularly when used frequently or at high temperatures.
To reduce unnecessary exposure:
- Use the lowest effective temperature.
- Keep hair completely dry.
- Apply heat protectant as directed.
- Avoid repeatedly passing over the same section.
- Keep the tool moving as appropriate.
- Give your hair breaks from heat styling.
- Be especially careful with bleached or chemically treated hair.
If your hair is severely damaged or chemically processed, consider consulting a professional stylist before using high-heat tools.
How to Clean a Hair Waver
Product buildup can accumulate on the barrels over time.
Cleaning steps:
- Unplug the waver.
- Allow it to cool completely.
- Wipe the barrels with a soft, slightly damp cloth.
- Remove stubborn buildup according to the manufacturer’s cleaning instructions.
- Allow the tool to dry completely before using it again.
Never immerse an electrical hair waver in water.
Hair Waver Safety Tips
Hot styling tools can cause burns and fires if used carelessly.
Always:
- Keep the hot barrels away from skin.
- Never leave a heated waver unattended.
- Place it on a heat-resistant surface.
- Keep it away from water.
- Unplug it after use.
- Use the manufacturer’s recommended temperature and operating instructions.
- Use the automatic shutoff feature if your model has one.
Is a Hair Waver Better Than a Curling Iron?
Neither tool is universally better.
Choose a hair waver if you want:
- Beach waves
- Mermaid waves
- Textured hair
- Faster uniform styling
Choose a curling iron if you want:
- Defined curls
- Loose curls
- Spiral curls
- More control over individual curls
Your choice should depend on the hairstyle you want.
Frequently Asked Questions
What is a hair waver used for?
A hair waver is used to create textured, S-shaped waves in the hair.
Can I use a hair waver every day?
Frequent heat styling can contribute to hair damage. It’s better to limit unnecessary heat exposure and use the lowest effective temperature with appropriate heat protection.
Should my hair be wet or dry before using a hair waver?
For a standard heated waver, your hair should generally be completely dry unless the manufacturer specifically says the tool is designed for damp or wet hair.
How long should I hold a hair waver?
The correct time depends on the tool, temperature and hair type. Start with the manufacturer’s recommended timing and avoid holding the tool longer than necessary.
Why do my hair waves fall out?
Common reasons include insufficient hold, unsuitable temperature, oversized sections, heavy products, humidity, or touching the hair before it cools.
Can I use a hair waver on short hair?
Yes. A smaller or mini waver can provide better control for short hair.
Can I use a hair waver on thick hair?
Yes. Thick hair may benefit from a waver with adjustable temperature and deeper or larger barrels. Use manageable sections rather than excessive heat.
Does a hair waver damage hair?
Any high-heat styling tool can contribute to hair damage. Using appropriate heat, limiting exposure and following heat-protection practices can reduce unnecessary damage.
Is a triple-barrel waver better than a single-barrel waver?
Neither is universally better. Triple-barrel models are often easier for consistent waves, while single-barrel designs can offer more control over wave placement and texture.
How do I make beach waves look natural?
Use larger sections, avoid making every wave identical, start below the roots and gently separate the finished waves with your fingers.
Final Thoughts
A hair waver can be a simple way to create beach waves, mermaid waves and textured hairstyles at home.
The best results don’t necessarily come from the hottest setting or the most expensive tool. Choosing a waver that matches your hair type, using manageable sections, protecting your hair from heat and allowing the waves to cool can make a significant difference.
Start with a lower temperature, practice your technique and adjust your styling routine based on how your hair responds.
Author Bio
Author Name: John Harwen
A beauty and hair care specialist with over a decade of experience helping people achieve their ideal hairstyles at home. Passionate about making professional styling techniques accessible to everyone through clear instruction and honest product guidance. Dedicated to promoting healthy hair care practices that balance beautiful styling with long-term hair health and protection from damage.